

Create an estate
- Owner
- Organization admin
- Concierge
Creating an estate gives you the page everything else hangs off: its service schedule, its assets, its visits, its requests and its history. Owners, organization admins and concierges can create one.
Create the estate
Section titled “Create the estate”-
In the sidebar, open Settings and select Estates, then select Add estate. The Estate Builder page opens with an empty form; a live preview of the estate card sits beside it as you type.
-
Fill in General:
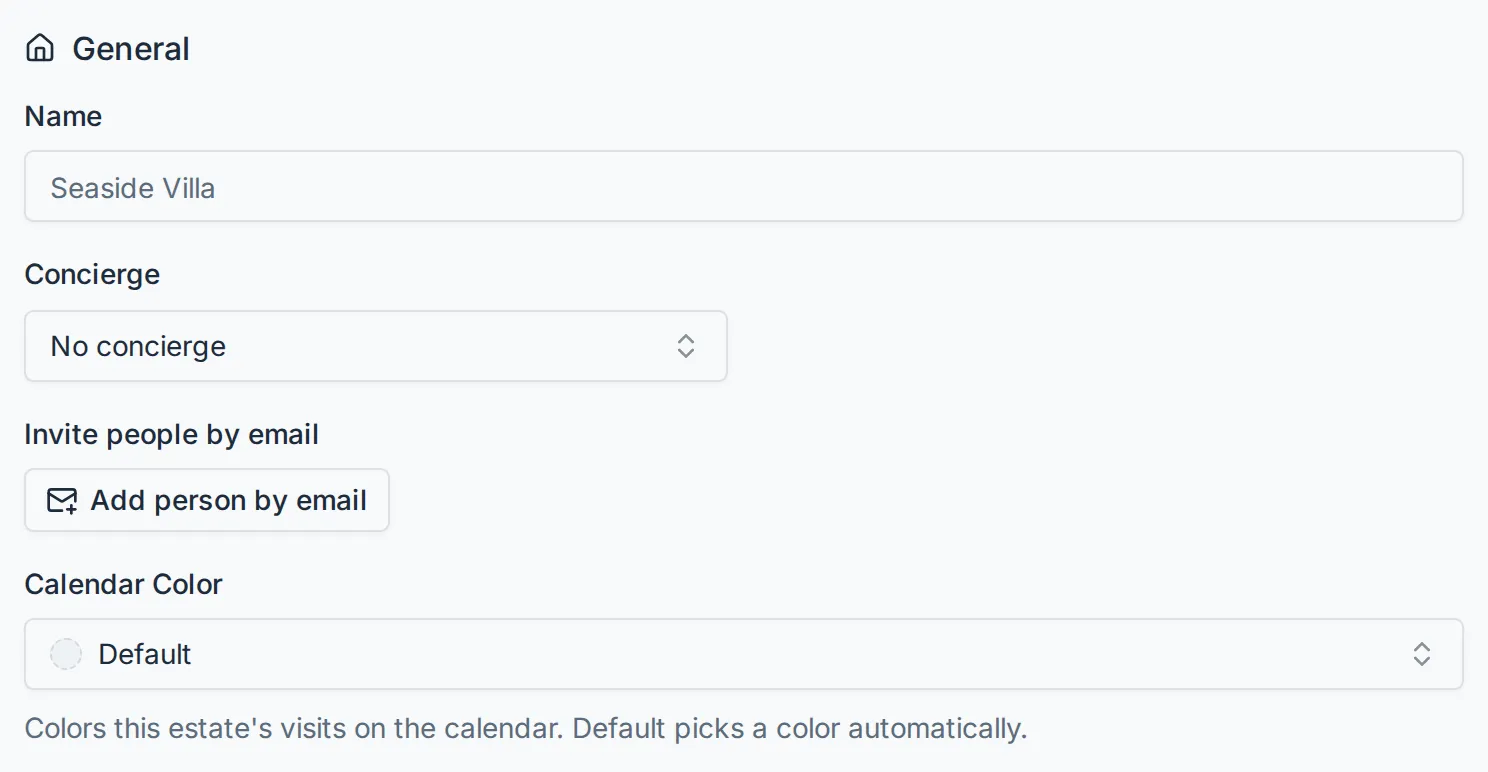
Field Notes Name Required. What the estate is called everywhere in the app. Concierge Who looks after the estate day to day. The list offers the organization’s owner, organization admins and concierges. Leave it on No concierge to decide later. Invite people by email Who reaches the estate. Give each person’s name, email and their role: Owner (they may raise requests, add to the manual and block out time), Viewer (read only) or Manager (acts for the owner; see Limit what an organization sees). Someone new to Steadwell gets an invitation email to set a password and sees the estate on their home from the moment they sign in; someone who already has an account - say, an owner another organization already looks after - is added straight away and told by an email naming the estate, and their home lists this estate beside their others. Nobody named here becomes a member of your organization. This is the only way a person is put on an estate: the Members page never does it. Calendar Color Colours this estate’s visits on the calendar. Default picks a colour for you; the picker also takes a colour wheel, eight presets, or a hex code like #3366cc. -
Fill in Address. Address, City, State and ZIP are required; Address Line 2, County and Municipality are optional. County and municipality are worth filling in - they are what staff look up before booking permitted work.
-
Fill in Details. Year Built is required and must be a four-digit year. Lot Size (Acres), Heated Sq Ft, Total Sq Ft, Bedrooms, Bathrooms, Garage Spaces and Detached Structures are optional; anything you leave blank is simply left off the estate’s details.
-
Under Starting assets, optionally tick one or more asset templates. Each one unfolds into a card of its assets: untick what this estate does not have and rename what it does, before anything is created. Skip this to start with an empty asset tree; you can add a template from the estate’s Assets tab later.
-
Select Create estate. Steadwell confirms with Estate created and returns you to Settings → Estates.
What happens next
Section titled “What happens next”The estate appears in Settings → Estates and in the Estates section of the sidebar for everyone who can see it. It has no visits yet: projection starts once you set a service schedule.
Open the estate from Settings → Estates to finish it off. The page is tabbed - Details, Schedule, Assets, Layout and Tasks - and the Details tab is the same form you just filled in, with Save changes in place of Create estate. View estate, beside the estate’s name above the tabs, opens its overview from whichever tab you are on.
The Layout tab is the estate’s map: upload a site image or a floorplan, then draw a region for each zone or asset on it, or place one you already added. Double-click a region to open its own floorplan. Every member of staff who can open the estate’s settings sees the tab, and places only what they may change: on an estate shared with another organization each organization shapes what its own people added and the parts it is set to look after; a concierge who maintains an asset shapes that asset and what is inside it. Everything else shows greyed out with a lock, and hovering a locked region says who looks after or maintains it. Drawing a new region is only offered where you may add an asset.
Add the preview photo
Section titled “Add the preview photo”The preview photo is the picture you see on the estate card, the home dashboard and the top of the estate page. It can only be added once the estate exists, so it is not part of the create form.
-
Open the estate from Settings → Estates. You land on the Details tab.
-
Point at the image panel on the right of the form and select Edit image.
-
In Edit Preview Image, drag an image onto the dropzone or select Browse files. Images up to 20 MB are accepted. The bar under the file tracks the upload as it goes, so you can tell a large photo apart from a stalled one; closing the dialog before it finishes cancels the upload.
Uploading again replaces the photo. There is no way to remove the preview photo and leave the estate without one, so upload a replacement rather than trying to clear it.
Add photos and documents
Section titled “Add photos and documents”Below Details, Files holds any number of photos and documents for the estate itself - an inspection report, an appliance manual, a photo of the irrigation shutoff. It is separate from the preview photo above: adding files here never changes what shows on the estate card.
-
On the Details tab, scroll to Files and select Add files.
-
In Add Files, drag files onto the dropzone or select Browse files. Photos up to 20 MB and documents (PDF, Office files, CSV, plain text) up to 25 MB are accepted, up to 10 files at a time.
-
Each file appears in Files as soon as its own upload finishes: photos as a thumbnail, documents as a row with their name and size. Select a document’s name to open it, or a photo to open it full size.
Point at a photo, or a document’s row, and select Remove to delete it.
These same files also live on the estate page’s Manual, in a collapsed Files bar above the asset tree that shows how many photos and documents are there. Select the bar to open it. Everyone who can see the estate sees the files there too, and whoever can manage the estate gets the same Add files tile and Remove inside it. The estate admin can add files there too, and remove only the ones they added.
Invite someone to an existing estate
Section titled “Invite someone to an existing estate”On an estate’s Sharing tab (Settings > Estates > the estate), or on the estate’s settings page for its owner (the Settings cog on the estate’s photo), Invite someone under People does the same for an estate that already exists, with the role picked in the dialog. People lists everyone on the estate with their role - the ones who have not signed in yet marked Invited - and Remove on a row takes the estate away from that person. That list is the record of who reaches the estate; there is no other.
The dialog’s Send invitation email switch is on by default. Turn it off to add the person quietly: they are on the estate with the role you picked, but no email goes out, and the button reads Add person. Use it for someone you will tell yourself, or whose invitation you want to send later - naming them again with the switch on sends it then.
Validation you may run into
Section titled “Validation you may run into”| Message | What it means |
|---|---|
| Name is required / Address is required / City is required / State is required / ZIP code is required | A required field is empty. |
| Enter a 4-digit year | Year Built must be four digits, for example 1998. |
| Must be a whole number / Must be a number | A size or count field holds something that is not a number. Leave it blank if you do not know it. |
| An estate with this slug already exists | Steadwell derives a short URL name (a slug) from the estate’s name, and it must be unique inside your organization. Two organizations may each have a “Cliff House”; one organization may not have two. Change the name - for example “Cliff House (Newport)” - and save again. |
| Selected members do not belong to this organization | The concierge or an owner is no longer a member. Pick someone else. |
| Enter a color like #3366cc | The typed hex code is not six hex digits after a #. |
| Keep at least one asset or remove the template | A template card under Starting assets has nothing ticked. Tick an asset, or untick the template in Templates. |